Wednesday, 21 October 2015

Time Flies with IndigoBlu!

I enjoyed making my blog challenge for this month! Here is my finished piece. I hope you like it!

To get back to the IndigoBlu blog challenge, simply click this sentence.

Completed project. The flake is so reflective, I love it! I do need a better camera though...

I started out with a cog clock MDF shape - (IndigoBlu Clock Kits)
I covered the clock with this beautiful paper - (IndigoBlu Flights of Fancy 12x12)
Using, of course, IndigoBlu's famous Slap-It-On!
I used the A5 stamp set Good Times
I had to add some of the gorgeous IndigoBlu Mega Flake, the colour used here is Lancashire Rose. (Click here for FlitterGlu and Mega Flake)
I then added some splodges of watered down IndigoBlu English Cottage Artist's Acrylic paints. I used the metallic colours Snow White and Miss Moneypenny.

I cut out the stamped clock faces, the extra butterfly (from the paper) and my sentiment - all of which I stamped on the Flights of Fancy paper, using Versafine inks. (I used smokey grey and onyx black). I then added to my clock face - partly glued flat, partly with foam tape.

I outlined the clocks using a black water pencil, which I then smudged (see first image).


The dimension of the paint drops, although not as rounded, has remained. I used the grey versafine to outline the sentiment.

Finished clock - before smudging my outlines.

Angled photo, to show the dimension (and some product placement!)

Monday, 21 September 2015

An IndigoBlu Autumn!

Hello and happy new challenge!

My favourite season is Autumn, so I'm delighted to be able to do a theme based on this wondrous time.

My project took a little detour from it's original direction however....

I hope you like it.


I started out with a plain little booklet, about A6 size. This I bought in a local craft shop locally to me (before it closed down, sadly), but this is most common in high street stores and/or supermarkets - although those will have a pattern on - mine was a plain kraftcard stock cover.

I painted the cover various times....With Black GeeSso-Good, then with Burning Bonfire (I just love that orange!).

I stamped over with stamps from the Poppy sets (see links below) using a Gothic purple StazOn ink. I then went over with a very dry brush using the Miss Moneypenny paint. (my favourite!!)

Here you can see the reverse of my book, and it's really rather lovely. I gave it a watered down covering with Miss Moneypenny, simply spraying water onto my craft mat then adding some paint, and mixing it up.  Once all was dry, I added a coat of Slap It On - to seal. (that Burning Bonfire paint is so so juicy and full of pigment that it still rubs of on hands when dry - even keeping the colour on the card!! It's insane!)


So, from this point onwards, I decided that I wanted to add a little more to the front cover...and here's where things when a little beyond 'little more'.......

And here is the result! Just a few bits and bobs glued on and voila!

I've kept to the autumnal colours - I myself and very fond of wearing purple during autumn.

I added a little Mega Flake at the end - Chocolate Box - oh so good, you'll want to eat! (but don't - really, don't eat it.)

All the colours of paint are listed below.

IndigoBlu English Cottage Acrylic Paints:
Miss Moneypenny; Aladdin; Emerald City; Snow White; Sleeping Beauty; Burning Bonfire.

Stamps used:
A5 Plume set; A5 Giant Poppy set; A5 Grand Tour II;  A6 Poppycock.

Friday, 21 August 2015

Frame It : IndigoBlu Blog Challenge

Hello and welcome back to my blog!

Beautiful frame for my dining room
I've had some fun playing with paints today, and mixed up some IndigoBlu paints to match the chimney breast in my dining room.

This lovely little frame is very ornate, and I liked it plain, however, that's no fun.....so I've given it an IndigoBlu makeover!

I cut down some card to the same size as the glass and stamped with the Dragonfly Dinkie stamp.

The frame was given an undercoat using Pantry White English Cottage Acrylic paint and then I mixed up Wimberry Pie and Iced Gem with Cinderella Metallic paint to get this shade of purple. Left to dry - with all the little nooks and crannies in the frame, some paint may gather and take longer to dry. This needs to be dry for the next step - as the Flitterglu is water soluble and although there is no water in these amazing paints, it will not adhere to the frame if the paint is wet. (you can speed up the process with a heat gun).

Next step was to use IndigoBlu Flitterglu on some Phat foam and randomly add, gently, to the frame. Gently, as I wanted it only to be added to raised areas of the pattern. I used IndigoBlu Mega Flake in Chocolate Box.

Put it all together, and this is a lovely addition to the sideboard in my dining room!

I hope you like my little piece of IndigoBlu art, good luck with the challenge! Click here to go back to the Indigoblu Blog Challenge Post

Maxine x
MEGA flake!
Beautiful Finish


Amazing fine stamp detail
Watching paint dry!


Tuesday, 21 July 2015

Precious Metals with IndigoBlu

Nothing really says "IndigoBlu" more than this month's theme of "Precious Metals", as we all think of the amazing Mega Flake! But, it's not just the Mega Flake, we also have the wonderful IndigoBlu Metallic Paints too!!!

In this card, which I've created as for the IndigoBlu Blog Challenge, I've used the IndigoBlu Mega Flake (Winter Dawn) and the IndigoBlu Metallic Acrylic Paints in Cinderella, Sleeping Beauty and Snow White.

The stamps used are A6 Script background, and the Dinkie Heart Flourish.

The wonderful thing about a heart on a card is that you really don't need a sentiment...!

I hope you like my card - please leave any feedback and make sure you pop back to the Challenge blog and enter your own challenge!

I look forward to seeing the entries, as do we all!

Peace to all x

Heart Flourish stamp detail


close up of Script stamp with Mega Flake


Monday, 22 June 2015

Summer Fly

I have today created a lovely project for Kuretake with the theme of Summer!

As I was creating this rather wonderful Kuretake Design Team project, I had a little song playing in my head called "Summerfly" which is a lovely song by Maura O'Connell. Has such lovely, and also quite haunting lyrics. Nonetheless, I was humming and singing as creating, which I think is a good way to craft!

Feeling inspired by the lovely colours of the paints and flowers growing in my garden, I decided to use a giant Peony stamp from IndigoBlu - seriously, it's massive! - and use the wonderful, gorgeously scrumptious Kuretake Gansai Tambi Japanese watercolour paints. I really love these paints, I can't express how much!

So I started with a sheet of watercolour pape, it's just smaller than an A4 sheet. I covered my paper with a quick swish of water to ensure the paints blended together nicely. Then, using a large brush, I  simply applied diagonally over the paper to create a rainbow effect. I left this to dry. You could also use a heat tool to dry if you wanted to.


I used a waterproof archival ink and stamped the Giant Peony and the Dragonfly stamp to my page. I wanted to add leaves to the flower, so I stamped the Giant Peony stamp onto a piece of scrap card (I only inked the edges of the stamp, this saves ink!) The impression is not what mattered for this - I wanted to make a mask, so I stamped and then cut this out. Cutting is my least favourite thing, so I put on some good music to sing along to!


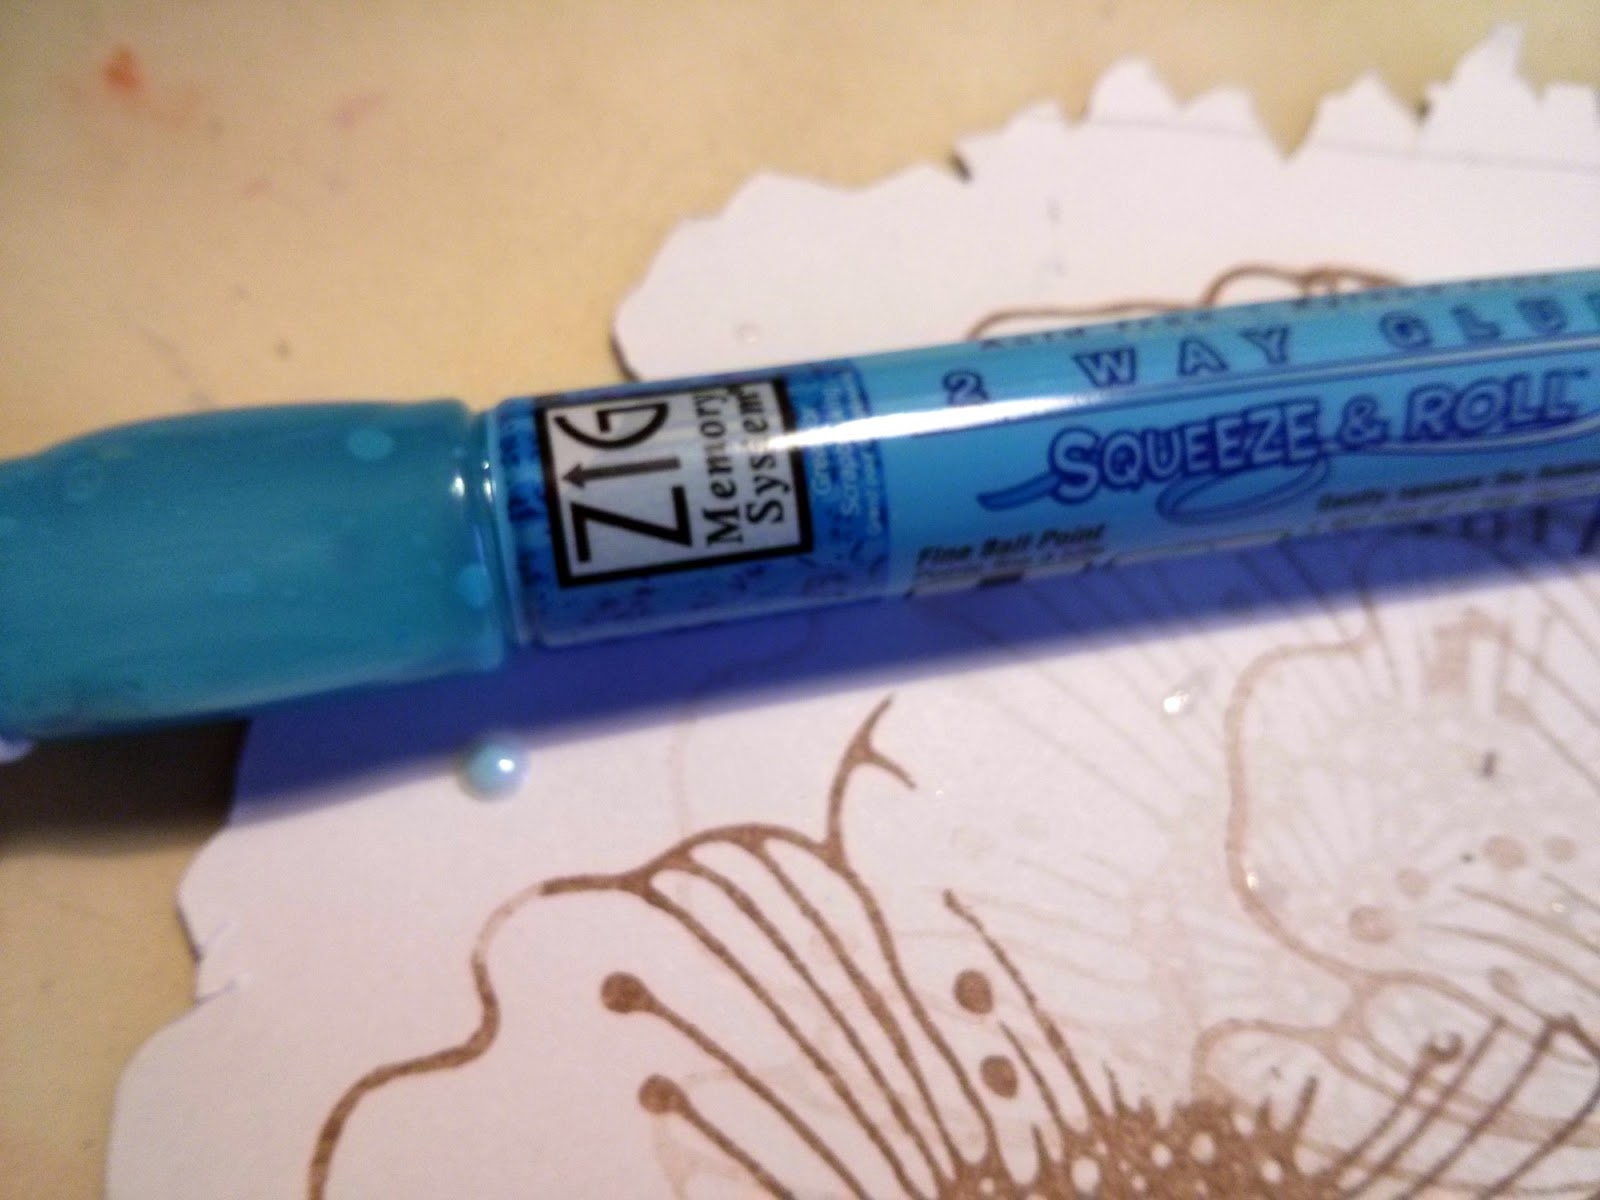
Now, I wanted to attach the mask to the paper, but I wanted to remove it easily...therefore I'd like to share another great use of the ZIG Memory System 2 Way Glue Pen! I squeezed a few drops on the reverse of the cut out mask, and left it (it just needs to go clear and be tacky, but due to a hectic couple of days, I left it for 2 nights!!) As you can see in this photo, the glue comes out with a blue tint to it. Used immediately, this will stick your project down. BUT if you leave it, it goes tacky, then you have a re-positionable mask!


I popped my mask over the top of the peony and then took the leaf stamp (also from the Giant Peony set) and stamped in the desired position. Here you can see where the stamp is over the top of the flower...It doesn't look good just yet....


But, hey presto!, remove the mask and the leaves are in position and look as though they are behind the original stamped image. I then painted the image using the Gansai Tambi watercolour paints - I'm a little bit obsessed with this particular colour of red - it has a gorgeous pinkness too it!


I wanted to add some words and also to show off how fabulous this next Kuretake product is - the ZIG Emboss pen - now I'm not good calligraphy, so I simply wrote words in, what I hope, is neat writing. I have adjusted the colour hues on this photo just so you can see how the pen looks once used - it has a blue hue to it, which is basically a clear ink, it's waterbased, much like an embossing ink pad would be - but I love this because you can write or draw whatever you want for embossing! I added my embossing powder (I used some ultra-fine ones - see the 'ingredients' below) and then used the heat gun to 'melt' the embossing powder into place.

For those observant humans, you will notice that I've applied glitter to the dragon fly wings... I used the ZIG 2 way glue pen to the wings and then sprinkled a very fine glitter over the top. It's not easy to capture in a photograph (I must buy the Kuretake Wink of Stella pens... I have a feeling they will look awesome on the dragonfly wings!)


And here is the completed project!! I have also used the ZIG Millenium fine liner pen to write a few more words - in fact these are inspired by lyrics from songs. One I mentioned above...I wonder if anyone can recognise the others song I was inspired by? It's an old one!


Thank you for reading my blog. Please feel free to ask any questions. I've listed the ingredients used in this project below for you. I hope you have a play with the Kuretake pens and paints - and I hope you share your projects too!

Peace to all,
Maxine

Products used for the above project were:
Kuretake Gansai Tambi watercolour paints
Kuretake ZIG 2 Way Glue Pen
Kuretake ZIG Emboss Calligraphy Pen
Kuretake ZIG Millenium pen
IndigoBlu Giant Peony A5 stamp set
IndigoBlu Dinkie Dragonfly stamp
Ranger Archival Ink Pad
DecoArt Glamour Dust (the glitter)
Cosmic Shimmer Ultrafine Embossing Powders ( various )


Sunday, 21 June 2015

Flutterby Butterflies


I have a few butterfly stamps from IndigoBlu and they are all equally beautiful - however, I had this little frame and wanted to do an ombré effect with the IndigoBlu Cottage Acrylic paints and then overlay in black - to really make it pop! I even left in my overstamp lines and I was a little heavy handed, but I do sometimes like to make it look a little handmade with a couple of human errors (because I'm not perfect!).

To start, I took the IndigoBlu Script stamp, and, using Blue Hawaii StazOn, stamped the back (it took two to fill my little piece of card, which I had pre-cut to fit into the frame. I used my heatgun to ensure the ink was complete dry/set.


The colours I have used on the background sheet of card are Postbox Red, Burning Bonfire and Banana Custard. I put some paint onto a paper palette and then sprayed with few squirts of water. I used a brush to apply to my card, over the ink - I started light and went darker and blended the paints to get the graduated effect. As I had applied water, thereby thinning the paint, plus used a brush to thinly apply, you can see the script through the paint and it really tones down that into the background.


I took the butterfly stamp from the IndigoBlu Nature 1 A5 stamp set (I love this stamp so much!) and used black StazOn - very simple, yet effective over the top of that background.

Next, the frame needed pimping up! It was a simple wooden frame, and had been painted with black IndigoBlu Gee-Sso Good. I carefully removed the frame back and glass, then ripped up some strips of regular nose tissue and coated the frame with IndigoBlu Slap-It-On. I applied the tissue so to leave it a little wrinkled - I'm not going for a smooth tissue technique here, I'm going for texture! Apply and then go over the tissue with the Slap-It-On, and encourage wrinkles, even little tears here and there. Overlap in places to really add to that texture. It will look pretty awful at this stage! Leave to dry!


My next step was to give a really good coat of the Gee-Sso Good in black. I only needed to do one coat, but you may need to touch up a couple of areas, as I know I always miss the odd bit! Leave to dry once again!

Lastly, using the IndigoBlu Metallic Cottage Acrylic Paint, in Goldfinger, dry brush, using a sort of flicking motion with a large stiff brush. The size 20 Gold Line brush (that also comes with the mannequin kit) is perfect for this! (I have about 3 or 4 of these brushes now, as they are in constant use!!) The idea here is to try to just catch the raised 'wrinkles' of the tissue paper, but however you do this will work, as it really makes that texture pop! 

And that's it! Put the frame back together and voila! One very lovely little Flutterby Butterfly piece of framed artwork! I hope you feel inspired to create your own entry for this - there is always the chance to win some amazing stamps!


Here are the links to all the 'ingredients' I used for this project, for your convenience!


Thursday, 4 June 2015

Posie Pockets

Hello and welcome to my IndigoBlu Blog Challenge Inspirational piece!

If you have come from the IndigoBlu Blog - then click this line to go back.

Otherwise, still go have a look at all the other wonderful inspirational pieces from the IndigoBlu demonstrator team! (I can assure you, you will not be disappointed!)

In the meantime, I hope you have a nosy below and that you like what I have created - I had fun making this and I hope this will make you want to get out those papers!

The challenge this month is "A Pocketful of Posies", which got me thinking about pockets... So I made all sorts of pockets - little library card pockets, pocket shaped pockets, and settled on using a card with 2 pockets on it.

And here is the result:

A card with pockets, holding tags with flowers on!

Here you can see the pockets (I hope!)

The card was very simple to make - it is basically 2 A6 cards. I have folded both the pages, diagonally,  to create the 'pockets', added the paper (all from one 6x6 sheet of IndigoBlu paper), then glued it to the other card, just along the sides and bottom, ensuring I leave the middle and tops free for the tags to go into the pockets.


The tags

I've stamped the tags using the new Poppy stamps! I've taken from both the Giant Poppy A5 set and also the Poppycock A6. I stamped with Versafine Vintage Sepia, and coloured in with Kuretake Gansai Tambi watercolours, then distressed the edges with Distress Ink Walnut Stain.

My chicken, Georgie, wondering what I'm doing
And here is my chicken - she was watching very curiously, while I took photos of the card in a big plant pot of ornamental grass (which my cat usually likes to sleep on in fact!)


I really hope you like this, I really did have lots of fun making this, I tried to make a pretty card, but I couldn't help myself, I had to grunge it up!

Peace & harmony to all,

Maxine xxx