Wednesday 8 October 2014

Upcycled Can

This month, I've been up-cycling various objects that would otherwise go into the bin, or the recycling bin.  Bottles, boxes, some plastic cartons and also tin cans.

For this challenge, I wanted to incorporate my up-cycling phase...so here you have my little can for those handy bits and bobs you craft with....scissors, palette knife, brushes, pens, etc...


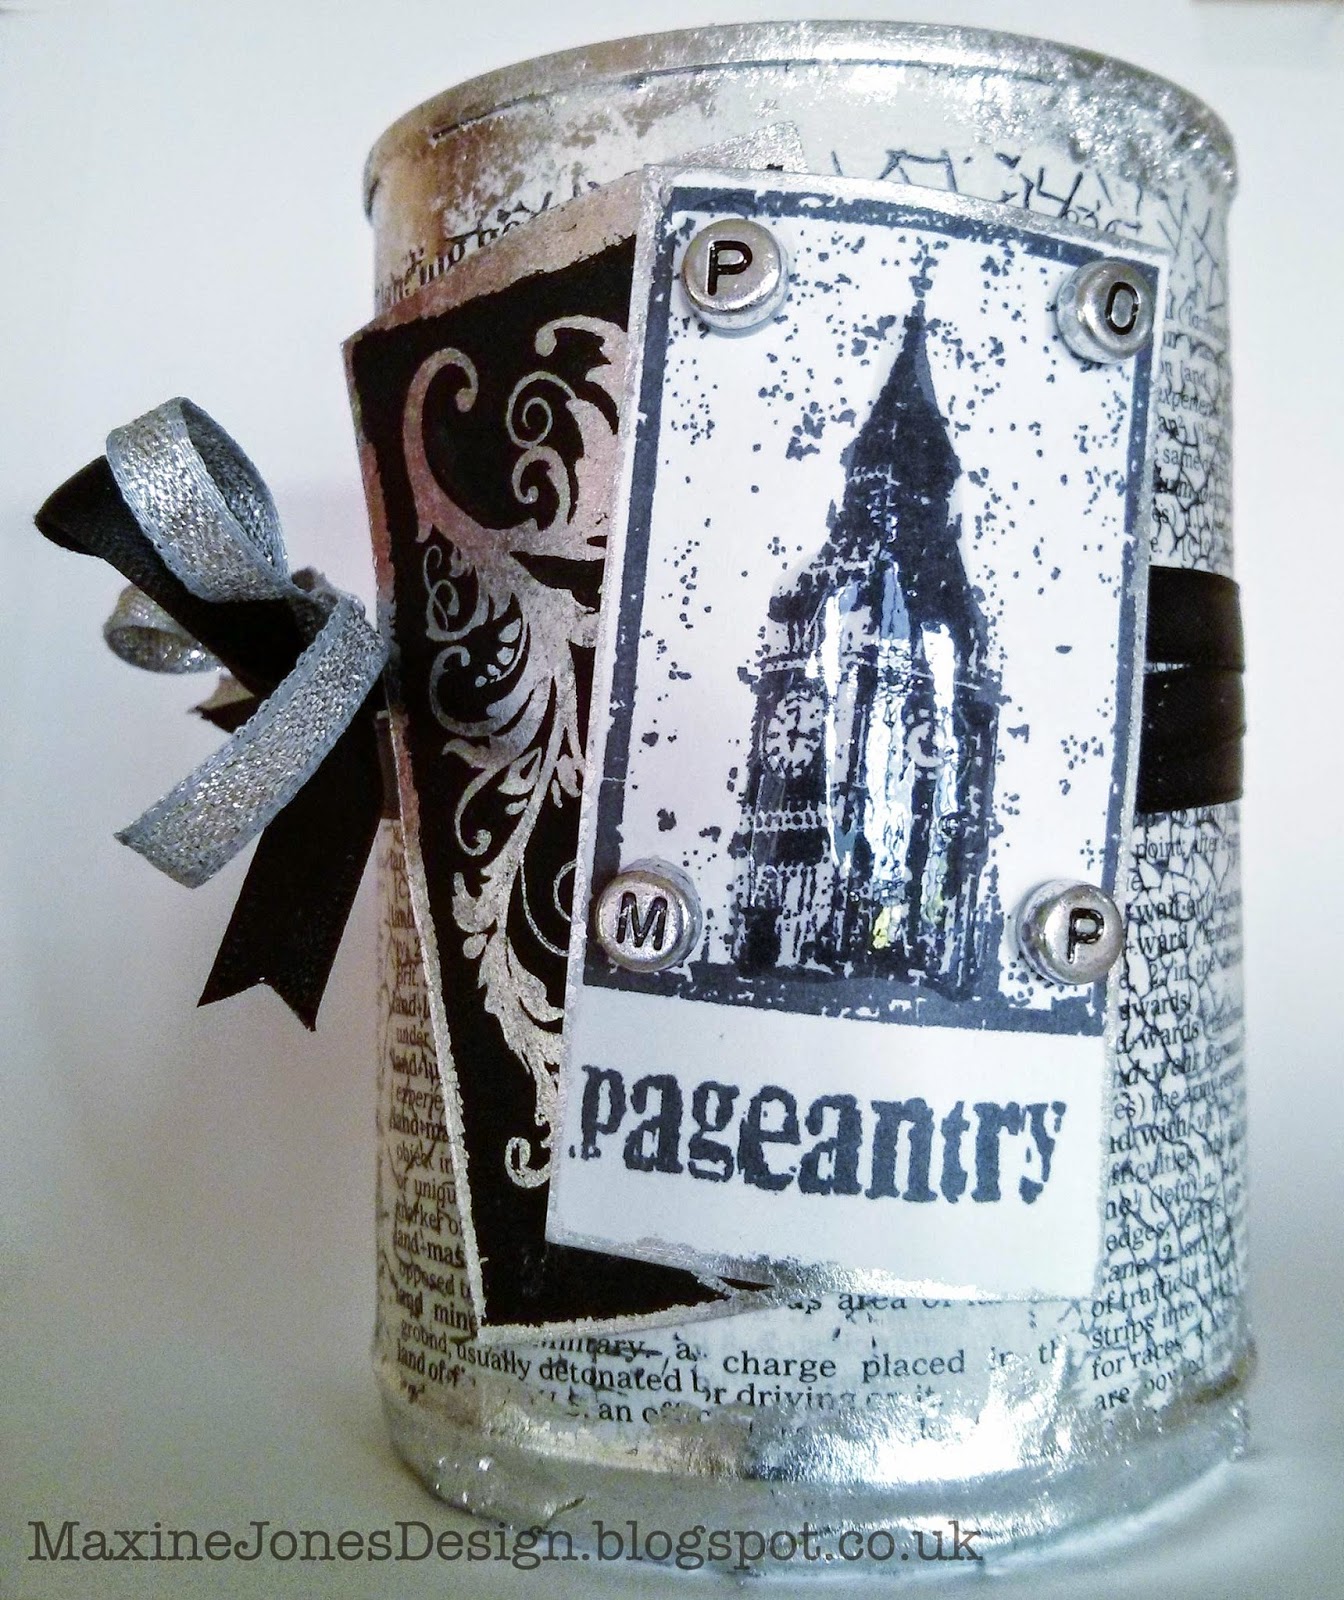
I have used stamps from the Pomp and Pageantry A5 set.
I added the florish to black card with Flitterglu, then added Sheffield Steel Mega Flake.
I stamped the Big Ben image onto white card, used 'pageantry' only from the wording below. Added some Glossy Accents to Big Ben to give it a little k-pow! Added beads from my stash to spell "POMP" in the little circles.
Both are edged with the Sheffield Steel mega flake.

For the can itself, after a good clean and removal of the label, I used my "Slap it On" to stick pages from an old dictionary on, randomly, by ripping and decoupaging on. I rolled my dried can onto my inked up Crackleglaze Background A6 stamp.

The top and bottom of the can have been Flitterglu'd and Sheffield Steel Mega Flake applied.

A piece of black ribbon was wrapped around and then tied into a bow, and then I added a further piece of silver ribbon, this just the bow tied to the black bow, to give it more dimension. Stuck on my toppers, and the can is complete!

(I also used some silver spray paint on the inside, just to seal it - this I did at the beginning).

I hope you like, and I hope you are inspired to get upcycling and finding interesting things to do with bits of rubbish!

Happy crafting,

Maxine

Friday 3 October 2014

Little black book

Good day fellow bloggers! It's been a while since my last post! I've quite a few unfinished blog posts that I must continue with, however, as requested, I am adding photos of my little mini book I made with all IndigoBlu stamps, which I thought would be nice to have on my demonstration table for people to look at.
Little cover page!

Firstly, the book itself was something I saw on the docraft site, and it was either Clare Curd, or Sheila Halliwell, I think, who demo'd on on a little video. I've had a quick peek and cannot find it, but this is going back about 3/4 years and they've got a new look site now. The basics are - take a 12x12 sheet of card or thick paper (preferably double sided) and then score at every 3 inches. Fold each score and use a bone score/fold tool (I do not have one, so I either use my scissor handles, a ruler, or an acrylic block, whichever is closest!)... 3 simple cuts are then made.  I have drawn a little illustration to hopefully make this clear - it's not to the correct size - as 12x12" would be a little large to have on screen! Score and fold on the dashed lines, then cut on the red lines. Concertina fold from one of the bottom corners (of the illustration) and you end up with a little booklet - look online for many very good tutorials on this technique!

A quick sketch of how to fold and cut.

So, here are the pictures of the inside of my book, stamped with IndigoBlu stamps, using black Memento, and using IndigoBlu Mega Flake on the cover. I hope you like it!

Coloured this stamp with Distress Inks and stuck into book.

Cool little pocket, with love stamps.

A little pocket and some Glossy Accents on the watch.

Love the birds, I went a bit mad with them!

With an More than Words stamp!

Look who's in the door!

A little pocket for holding bits!

From the Nature set - love the ink blot butterfly!

I love this More than Words stamp!

A little door!

The back page!


A little clever use of glue and you can create little pockets and doors! It's lots of fun, the only problem with it is deciding what to use to make it!!

Have fun and I hope you enjoyed my little book - to those of you who asked, I hope this is what you were hoping for!

All the best,
Peace & harmony,
Maxine x